If you’ve been at the guitar game for a few years, it can get easy to suddenly feel like you’re on a hamster wheel of constantly playing the same things over and over again. The initial excitement of learning how to master chords, scales and riffs often gives way to a sense of complacency in some guitarists, and it makes perfect sense if you think about it. The human brain is hardwired to recognize patterns, and these patterns are what helps us form habits over time. Learning something new can be a difficult task for some people because whether we’re brain surgeons or young children picking up an instrument for the first time, we don’t like feeling uncomfortable. But if you want to develop your skills on the guitar, you’ll have to put yourself back in a similar position you were in when you first picked up the guitar. This is a special Musika Lessons intermediate guitar tutorial aimed at beginner guitarists who are trying to advance to the next level. In addition to providing some helpful exercises, we’ll throw some tips and guidance your way that are aimed at helping your playing truly evolve. Ready to jump in?
To get the most out of this tutorial, here’s what you’ll need:
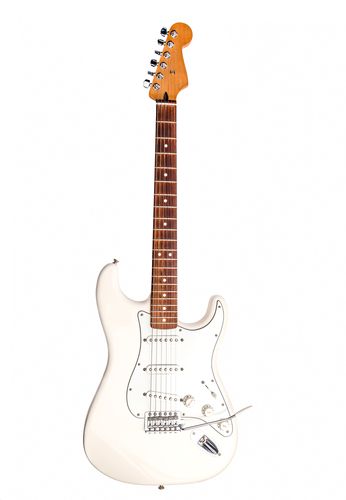
-A guitar, obviously. Electric or acoustic is fine.
-A metronome. If you aren’t regularly practicing with one of these, we’ll tell you why you should be in a minute.
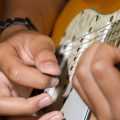
-A way to record yourself playing. The Garage Band software on Apple products is a great choice, but this can also easily be done on your smartphone.
-Pencil and paper to write down the exercises you’ll see here in this tutorial.
Why the transition from beginner to intermediate guitar playing is so difficult
The vast majority of guitarists out there enthusiastically pick up the guitar for a few months, learn a few rudimentary skills and then maintain their skills without continuing to develop as musicians, and there’s absolutely nothing wrong with that. But if you’re wanting to advance your playing to the next level, you’ll need to make a concerted effort to get there.
Like we mentioned before, humans favor habits and complacency. This is why learning guitar was probably difficult for you––unless you’re in the small majority of people who picked up instruments very quickly. But now, you’ve developed a set of skills, some muscle memory and habits that allow you to play basic things on the guitar with ease. The scales, chords and songs that once seemed impossibly difficult to you now can be played with your eyes closed. You wanted to do something new, so your brain and body agreed to be uncomfortable for a little while in order to make it happen.
But now you’ve become comfortable again and that coziness is a very hard thing to break out of. It feels good and affirming to live in familiar territory, but you’ve got to break out and head somewhere else if you want to move up to an intermediate guitar level.
The importance of practicing with a metronome
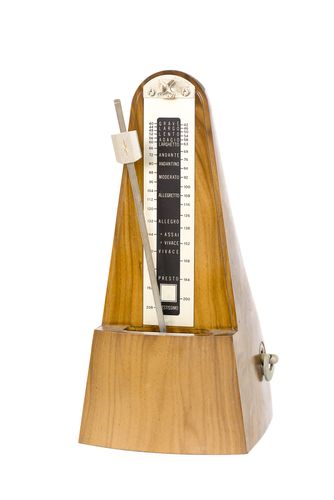 If you aren’t in the habit of practicing regularly with a metronome, drop everything you’re doing and practice what you already know with one from now on. Lots of guitarists opt out of playing with a metronome because they don’t see it as being that helpful, but they couldn’t be more wrong. Whether you’re recording a song with your punk band or are simply learning how to play “Dust In The Wind,” practicing along with a metronome will help you develop and solidify your rhythm skills.
Before anything else, guitarists are rhythm players. This is because 99% of guitar music is rhythm-based. Getting into the habit of practicing scales, riffs and chord progressions with a metronome could evolve your playing in just a week or two. Everything we have to show you in this tutorial should be practiced with a metronome in order for these exercises to truly improve your playing.
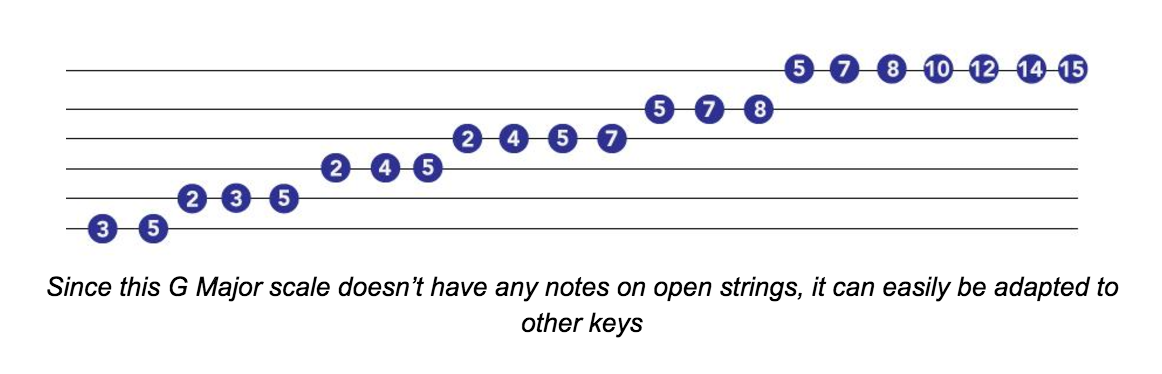
Exercise #1: The 3-octave major scale with 8th notes, 16th notes and triplet variations
Sticking to playing simple 1-octave major scales would be considered basic guitar playing, so we’re going to show you how to play a 3-octave version with no open notes so you can adapt it to other spots on the fretboard. But that’s not all! In this exercise, we’ll show you how to play this scale with different 8th and 16th note variations. If your metronome isn’t out and clicking during this exercise then you’re doing it wrong. You’ll need to hear and keep track of the main beats in order to accurately keep track of the variations in rhythm you’ll be practicing this scale with.
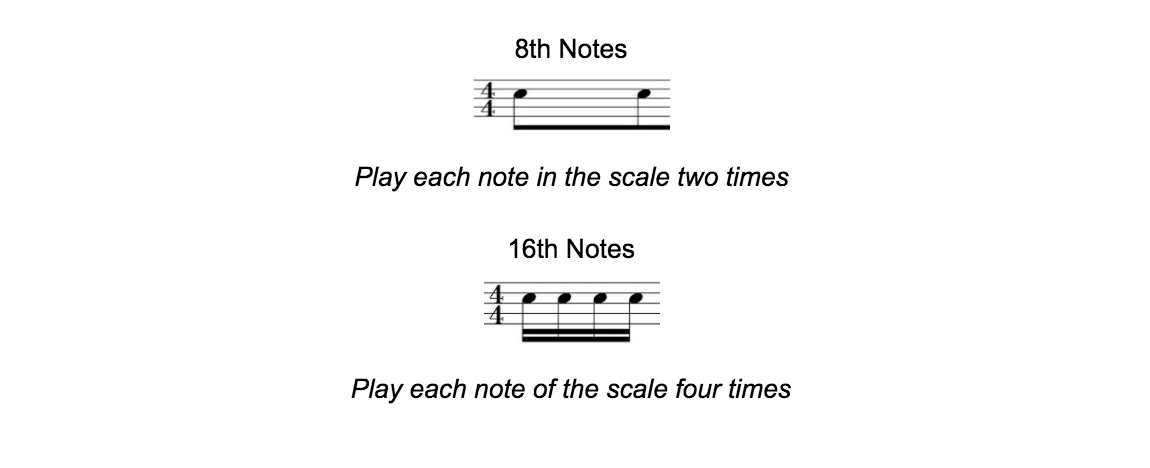
It’s also essential that you practice this exercise with alternate picking. Alternate picking is when a guitarist harnesses the natural momentum in their right hand to pick up and then down instead of strictly one direction. To start, have your metronome set to a low speed. Something in the range of 60-75 BPM (beats-per-minute) is fine. You’ll split this exercise into three parts. In the first part, you’ll play through the entire scale with basic quarter notes. For the second part, switch to playing the scale with eight notes. This means that you’ll play each note twice. In the third part, play each note four times with 16th notes. If you need more of a challenge, add a fourth section and play 8th note triplets for each note in the scale.
If it’s done right, this exercise will be difficult to play, but it delivers a ton of benefits. This exercise helps increase the speed, stamina and dexterity of your hands while showing you the difference between basic rhythms at the same time. Even if you have no interest in reading music, being able to identify and differentiate the difference between simple rhythms is a crucial skill for serious guitarists.
This scale is also a great way to explore a register of the guitar that you might never have been exposed to as a beginner. Folks new to the guitar usually stick to the first three frets, but this scale goes past the 12th fret. And having access to major scales anywhere on the guitar is a massive help for songwriting and improvising.
Exercise #2: Improv in G minor
This intermediate guitar exercise is designed to help you improvise and get familiar with playing chords and scales in minor keys. Because it’s easier, most beginner guitar material strictly stays within major keys. If you’ve had lessons or have delved into the world of free guitar-related resources on the internet, you’ve probably gotten familiar with most basic chords in the keys of C, G and D. That’s great! But if you only stay within these keys, you’ll miss out on a ton of great minor guitar material out there.
There’s two components of this exercise. Your first job is to learn this simple chord progression in the key of G minor: Gm-Dm-Adim-Bb

Memorize each chord and then work on stringing them together without pausing in between. When you’re ready, record yourself playing this slow chord progression. Play the progression at least 10-12 times as you’re recording.
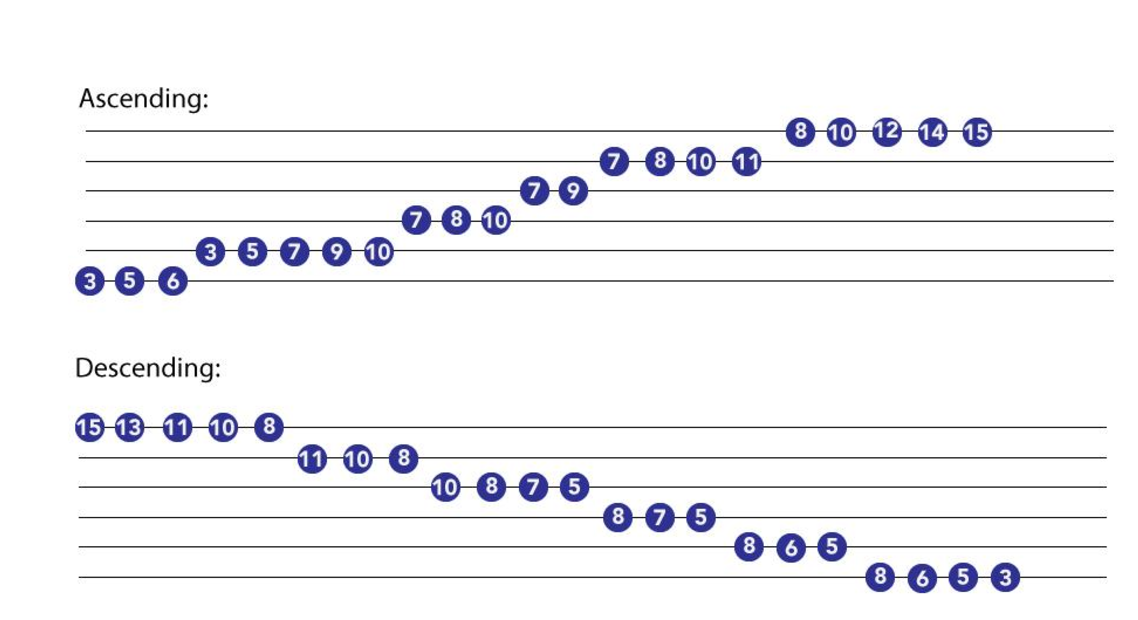
Now you’re ready to learn the second part of this exercise. There’s three types of minor scales in music: harmonic, melodic and natural. We’re going to show you how to play the 3-octave melodic minor scale in the key of G. The melodic minor scale is the only minor scale in music that has slightly different notes in its ascending and descending versions. It’s a fantastic scale featured in tons of metal and classical guitar music, and it will most likely be way more challenging than anything you’re used to playing. Like the major scale we showed you, this scale uses no open strings and can be adapted to any other key, but you might run out of room for the higher spots on the fretboard. The trick for memorizing this scale and being able to move it to other keys is to memorize the correct fingering and to play it the same way over and over again. Memorize this scale and then practice it with a slow metronome.
Now we’re ready to move on to the improvisational part of the exercise. Once you’ve memorized the 3-octave G melodic minor scale, start borrowing notes from it to improvise over the chord progression you’ve recorded. It might seem like you have no idea what you’re doing at first, but that’s totally okay. After a few tries, start trying to determine what combinations of notes you like the best and why. This is a great primer if you’re interested in songwriting or riff-writing, and it will help put many of the basic skills you’ve developed as a beginner guitarist to use. If you’re working with Garage Band, record a separate layer of yourself improvising with the minor scale and listen to the full version. Give yourself an honest critique and note the strengths and weaknesses in your playing. This exercise is just one combination out of the millions out there for using scales to improvise over chord progressions, so get creative and try some out on your own.

Exercise #3: Major and minor arpeggio shapes
Arpeggios are rarely covered in basic guitar lessons. Not quite a chord and not quite a scale, arpeggios are shapes in music that outline chords in a note-by-note fashion. Mastering a few basic arpeggio shapes will allow you to write and improvise material all over the guitar, and they’ll serve as powerful tools in your playing arsenal that can help increase your understanding of the guitar and music in general.
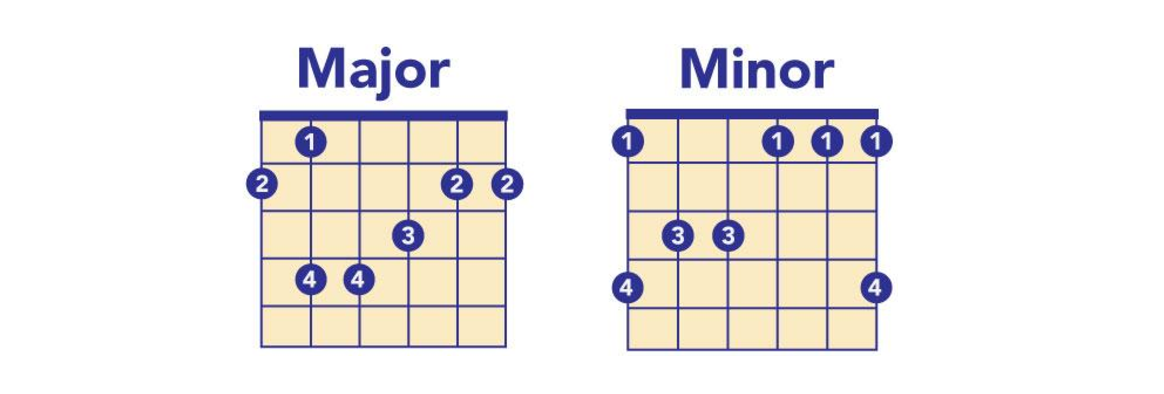
Before practicing these with a slow metronome setting, take some time memorizing these shapes. There are no open string notes here, so these arpeggios can be moved to any location on the fretboard. Once both shapes are memorized, solidify your knowledge by creating a basic arpeggio drill. Playing along to a metronome, start with the major shape down on the second or third fret and then transition to the minor shape without pausing. Then, repeat that same sequence up a fret until you reach the 12th fret.
Exercise #4: Chromatic speed drill
Getting comfortable playing at fast speeds is something you’ll have to do to be able to play many of the riffs and solos found in intermediate guitar songs. This simple drill is meant to get you started, but you should move it around the fretboard and change the order of fingers as soon as you can to make it more challenging.
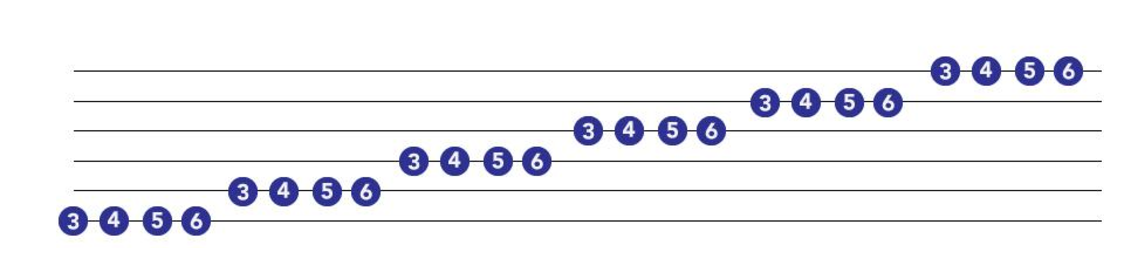
Start by practicing the basic version of this chromatic speed drill with a slow metronome. When you return to the starting note, repeat the same sequence up note until you reach the 12th fret. Increase the metronome speed five or ten beats per-minute and try the exercise again. The trick here is to find the a speed that is challenging but still playable for you. If you find yourself unable to keep up with the metronome, slow things down and build your skill level there. If you start this exercise at 125 BMP, you’re most likely headed for disaster. Speed is important, but being able to play to a rhythm confidently is absolutely crucial.
Other tips for intermediate guitarists
Depending on your instruction and background, you may or may not have a good grasp on music theory and how it relates to your instrument by now. If you do, great! But if you don’t, you should do everything you can to get familiar with music theory. Why?
Because every exercise in this article can be better explained and understood in a music theory context. Everything from scales and riffs to chords key signatures are just plain easier to understand and work with when you have a strong music theory background. If you’ve taken some guitar lessons, you might not have even broached the subject of music theory because for beginners, learning things like basic chords and exercises are more important that tackling complex theory subjects. But if you’ve covered the basics and want to advance to the intermediate guitar level, getting acquainted with music theory is one of the best ways to do it. For more helpful articles about the world of music, check out the Musika Lessons blog.