The impact and importance of room acoustics are rarely acknowledged by musicians. Everything about a room— the shape, the furniture, and the materials—greatly influences the perceived sound when you are in the room. While shaping and attending to the issues of room acoustics can be difficult, testing room acoustics is relatively easy.
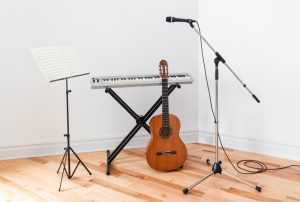
To understand how to test and alter the acoustics of a room, it is important to understand how room acoustics function and what impacts them. Regardless of the purpose of the room, if it’s used by performing artists then the acoustics will come into play. Even practice spaces should be designed with acoustics in mind, as a balanced perception of the performance is necessary to develop and hone a particular sound accurately.
Why Acoustics Are Important
The shape of a room has a dramatic impact on the perceived sound inside that space. If you’ve ever walked through a large, empty stadium or cathedral, you’ve surely heard the reverberation of your own footsteps. In a smaller space, echoing isn’t noticed because the sound doesn’t travel as far. Rather, the sound waves bounce back and forth off walls that are close to each other. When these sound waves overlap and interfere with each other, they can dramatically influence the sound in a space.
Depending on the phasing of overlapping sound waves, they can amplify or diminish a particular frequency range in the audio spectrum in a specific area of the room. This means that when you stand in one spot you are likely to hear a different mix than when you stand in another.
What Impacts Acoustics
Whether you’re mixing, recording, performing, or practicing, you want an accurate representation of the sound played, so testing room acoustics is important. This means that you don’t want sound waves to reverberate and overlap each other. It may sound like a difficult situation to control, however there are a number of identifiable factors that influence this.
Most notably, the shape of a room will determine how the sound waves bounce. Symmetrical rooms notoriously have poor acoustics. Rooms which are a perfect square or rectangle allow sound to reflect off walls and remain on a continuous path. This leads to the accumulation of certain frequencies in certain areas. An asymmetrical room will allow sound to bounce all over the place without building up.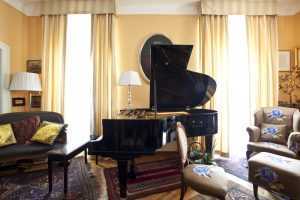
The materials of the room will determine how easy it is for the sound waves to bounce. Because you want the sound to either disperse or be absorbed, wall, ceiling, and floor materials are important. For a surface to absorb as much of the sound as possible—ultimately converting it to heat—it is ideal to use materials with a large surface area. Carpet will absorb more sound than wood flooring, because the sound waves will vibrate in the nooks and crannies of the surface. Curtains, tapestries, and other cloth-based wall coverings will help to dissipate and absorb sound better than the smooth surface of a wall.
The furniture inside the space will influence the paths of the sound waves. Just like the walls, it is ideal to have furniture that is absorbent. With furniture, though, you have to consider the size of the room. If it is a large room then you want furnishings to take up some of the empty airspace. However, if the room is quite small, too many furnishings will leave little room for all the sound to travel. You can end up with a room that is too loud and sounds busy.
Knowing these factors, it’s easy to determine the quality of a room’s acoustics simply by looking at the space and the materials that make it up. You may not need to do much as far as testing room acoustics, if you’re trying to choose a practice space or set up a home recording studio. Look for a space that is asymmetrical and carpeted, with a ceiling material that is either porous or fibrous. If you are limited to a symmetrical, boxy room, you can address the materials and furnishings, but usually altering the shape of the room is impractical.
Testing Room Acoustics
There are a number of trends among rooms that make testing room acoustics easier. Because rooms usually come in a limited variety of shapes, you can make certain inferences about how the acoustics will sound. The problems with most rooms’ acoustics are scientific constants that are standard in most spaces, and often they are easy to notice and treat.
Assuming you are dealing with a room that is relatively symmetrical, with flat walls, floors, and ceilings that parallel each other, there are easy tests that you can run to observe the quality of the acoustics in the room. Ideally, whenever you are trying to determine aspects of a room’s acoustics, it is best to be alone and in relative silence. Outside noise or other people in the room will impact the results of your testing room acoustics and they can detract your attention from listening carefully.
 When first entering a room, take a walk around and notice the sound of your footsteps. If it is safe to do so (i.e. there isn’t a lot of furniture or sharp edges in the space) it can be helpful to close your eyes. Pay attention to the echoes and reverberation of your steps. If you find that your steps are loud and echoing, then the room will likely be difficult to work with acoustic-wise.
Through speakers, play a song that is well-balanced and exhibits the full audio spectrum. Walk around the room while listening to the song, and notice how the volume and frequencies differ in various places in the room. This may be subtle or it may be quite noticeable. This will give you a general impression of the acoustics of the room.
Flutter Echoes
Close the door, stand in the middle of the room, and clap loudly. You will likely notice a fast series of sharp, high pitched echoes. These are often referred to as flutter echoes. The intensity of these echoes denote the quality of the acoustics in the room. It may be helpful to perform this experiment in a number of different rooms of different shapes and sizes to attune your ear to the variation in room acoustics.
If you notice intense flutter echoes, you will want to treat the walls, and possibly the floors and ceilings. Treatments can be as simple as hanging tapestries and putting down a rug, or as complicated as re-flooring or lining the walls with acoustic treatments. There are many different wall treatment varieties available, and they all range in price and efficacy.
Remember that the key is to disperse and absorb sound waves using a greater surface area and odd angles. Keeping these in mind, it’s easy to get creative when treating the acoustics of a room, and there are many wall, floor, and ceiling treatment options for people on a budget.
Pink Noise for Testing Room Acoustics
The best way to thoroughly understand the dynamics of a room’s acoustics involves a simple test using pink noise. This test will allow you to find the problem areas of a room. Once you understand how sound is impacted in a room, it becomes much easier to shape and develop the acoustics to a neutral and even status.
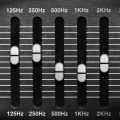
Before beginning this test, it may be helpful to understand the audio frequency spectrum. Our ears are capable of discerning audio in the frequency range of 20Hz to 20kHz. The low number range (from 20Hz – 300Hz) is perceived as bass or low-end. The middle range is from 300Hz – 2000Hz, and high range is from 2kHz – 20kHz. Consider listening through tones in each of these frequency spectrums in order to develop an understanding of the general ranges. You will want to be able to decipher the approximate frequency when listening to your room’s acoustics. That way you will be able to take notes on problem areas in the room. There is also equipment available which will tell you the frequency analysis of particular areas. There are even smartphone apps that can help with this.
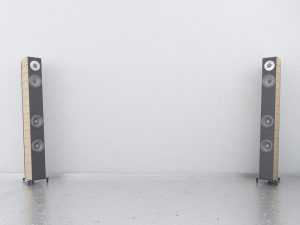 You will also need a good set of speakers. While one or two speakers will suffice, it is helpful to have a number of speakers distributed throughout the room. These speakers should be connected to an audio program which allows you to play pink noise. Pink noise is simply every frequency in the audible spectrum projected at the exact same volume. It is similar to the more recognizable white noise, but they differ in that white noise is scaled so that the higher frequencies are projected at a greater amplitude. As bass frequencies can mask the intensity of higher end frequencies, white noise sounds balanced to our ears. But for testing room acoustics you will want the frequencies to actually be the same amplitude.
Play the pink noise at a volume that is loud but not uncomfortable. While the pink noise is playing, walk about the room. You will notice that the sound varies in tone as you move throughout the room. There will be areas that sound more bass-heavy and there will be areas that are higher pitched. This is the result of sound waves overlapping and certain frequencies cancelling out or combining and amplifying.
As you walk around, it may be helpful to take notes on the particular problem areas of the room. If you have a frequency spectrum analyzer, you can use this to get an accurate understanding of the specific frequencies that are out of whack in specific places.
Generally, the middle of a rectangular or square room will be the most problematic. Pay particular attention to the center of the room, as this is also where people tend to stand and listen. The corners of a room are notorious for accumulating bass frequencies, and it is worth noting and listening to the corners of the room, as well.
Treat the room and re-test room acoustics
Once you have a general idea of the room acoustics, and in particular the problem areas, you can begin to treat these areas. It might be helpful to move furniture around and notice how the acoustics have changed. If you will be treating the walls, floor, and ceiling, hang the treatments and lay the carpeting parallel to the points in the room that are the most problematic.
There are many treatments available for corners, such as bass traps, but placing square blocks of foam is a simple, cost effective way to manage these. As you treat the room, continue testing room acoustics, and make notes of how the problem areas have changed or moved.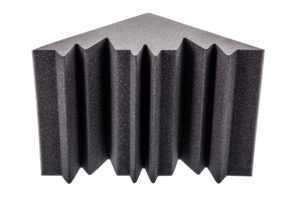
Once you have used all the desired treatment options, re-perform the clap-test in the middle of the room. The flutter echoes should be noticeably reduced. Your footsteps in the empty room will likely sound different. Put on a song that has a wide and dynamic range of frequencies and volumes. Walk around the room listening to the song, just as you did with the pink noise test. You should notice that the song sounds relatively the same at any point in the room.
If the song varies in tone, re-test the area using the pink noise test and a frequency analyzer if you have one. You can re-check and re-treat the room until the acoustics are relatively even. If the room is simply a practice space, then it is not important to achieve perfection with the acoustics, however if it is a recording area, you will want the acoustics to be as balanced as possible.
Recommended Articles for You
 Mixing Basics: Intro to Audio Mixing
 Play By Ear: A Quick Guide for Beginning Musicians
 Beginners Guide to Recording Studio Equipment
 The Benefits of Learning About Audio Engineering
 Why Music Theory Still Matters for Musicians
 Ear Training for Musicians: A How To Guide
 Tips for Recording Live Music
It’s good to know that, depending on how sound waves overlap in a room, certain sound can get diminished or cancelled out. In certain situations, t’s important for you to hear the true sounds around you based on the vibrations in the room. I think it’s important to find ways to set up a room with the right acoustics to help you hear the true sounds or to control the sound.